Nothing could be as exciting and pleasing as witnessing the beginning of a new life; be it of a human or an animal. And then watching the new born growing up from weak and feeble into strong and sturdy being is awe-inspiring and also satisfying, if you are responsible for that.
You do not necessarily have to wait for the birth of your own child to experience that excitement, pleasure and fulfilment when there are pets.
While there are so many choices, hens are the pets that give you an opportunity to witness and feel all the above mentioned moments and feelings quite often and from the very early stage. You start feeling excited from the very moment when a hen sits on eggs for brooding or you put them in an incubator. You eagerly wait for the day when you get to hear the very low soft chirpings from inside the shell, the moment when eggs start hatching and finally the time when tiny chicks come out of those eggs and see the new world with surprise and amazement.
This priceless and emotional experience is a reason alone enough to make people go for chicken keeping. If you are planning to be a part of this process, but do not know how to go about it keep reading this article.
We are going to discuss the two different ways of hatching and then how to rear healthy chicks.
The Two Methods of Hatching
There are two ways to hatch chicken eggs:
- The natural way
- Through artificial incubation.
No matter what method you choose, the chicken eggs need 21 days of brooding/ incubation to finally hatch on the 22 nd day. Let’s discuss the basics of each method to help you decide which one to go for your chicken eggs.
1. The Natural Way
Natural hatching is really simple and ideal if you are raising a few chicks. All you need is fertilized eggs, a broody hen, a separate place, where she can stay for 21 days undisturbed, and a little patience.
Make sure to take her off the eggs once every day for food and water or keep the food and water container near her so that she could eat and drink whenever she wants. Also, ensure that eggs and the hen is protected from the possible predators. The hen should be taken away from the remaining flock during this time so that she won’t be disturbed. However, do not completely alienate her. A separate space just a little away from the coop of other chickens is fine.
Know that not all chicken breeds are good for this natural hatching process. Hens from Brahma and Silkie breeds are considered as wonderful mothers.
While you may be tempted to see the eggs hatching, which may take up to three days to complete, beware of the hen as she is likely to be over-protective for her eggs and might get aggressive because of your intrusion.
Another point to keep in mind during natural hatching is to not make two hens sit on eggs close to each other. If you do not have separate spaces for them, make sure to put the eggs for brooding the same day.
This is important because if one hen’s eggs start hatching early and the other hears the chicks’ cheeping, she will get off her eggs.
2. Artificial Incubation
This is an alternate method widely used for hatching. While this method is more commonly used in poultry farms, where there are large numbers of eggs, some beginners also use it to make up for the absence of a broody hen.
While there is no dearth of fertilized eggs in an established poultry farm, those who are at the initial stage buy the fertilized eggs from the market.
Depending upon your needs, you can buy professional or home incubators, hatchers or brooders, easily available in various sizes. If you don’t want to visit multiple shops to see what’s there in the market, click here to learn about their varieties and to get them delivered to your doorstep.
The artificial incubators are designed in such a way that the eggs are provided the conditions exactly like the natural hatching. However, in certain areas, you need to make up for the absence of mother hen, such as keeping an eye on eggs, turning them daily and to follow the manufacturer’s instructions to the letter.
Also, you need to be very careful in maintaining the temperature and humidity level inside the incubator.
According to the guidelines given by the University of Minnesota, the temperature of the incubator should be maintained within the range of 99 to 102 degrees Fahrenheit. The humidity level needs to be between 50 to 55% and should be increased to 65% during the last 3 days.
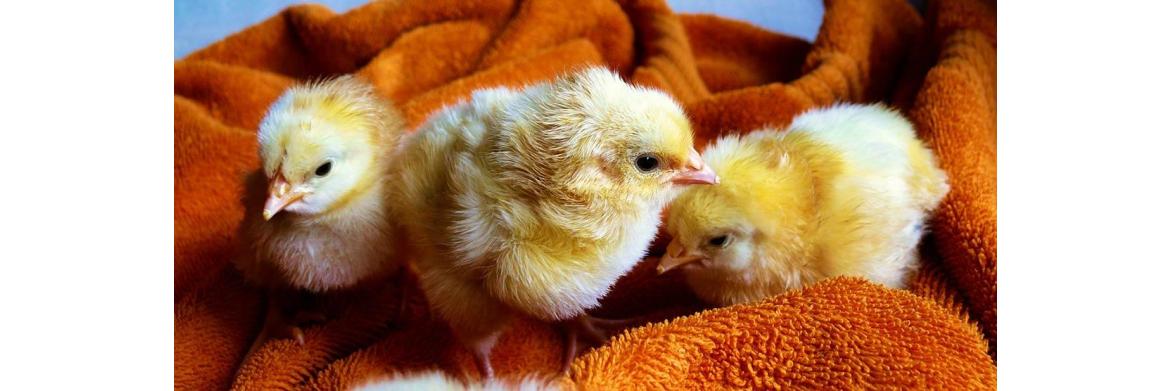
Chick Rearing
Once the tiny chicks are out of the egg, they need care and protection until they are able to do it on their own. The mother hen takes care of this step if you had opted for natural hatching.
Ever seen little chicks huddled under the mother hen’s wings?
It is her way of providing them the temperature required for their healthy growth. Make sure to regularly supply food and water in chicken feeders and shallow pans (so that the chicks won’t get drowned). The mother chicken will ensure that chicks eat and drink properly.
Keep the hen’s food outside of chicks reach. Also, make sure to protect their coop from predators, extreme weather conditions and any potential harm. Remember, chicks are favorite meal of many animals and birds so, do not compromise over their safety. The hen should be left with chicks for about four weeks.
When mother hen is not there to do all this (in case of chicks born from artificial incubation), you will not only need to take care of their food, but also for providing them the heat, through artificial means of course, that is needed for their healthy growth. They need to keep themselves warm. Install a bulb or lamp with infra red heat, also called brooding lamp/bulb, in chicks coop for that purpose. Take a look at different types of artificial heating equipment.
Additionally, take care of the hygiene and regularly change their beddings to keep the coop dry.